
Quick Summary
Adding a payment method to ChatGPT Ads is one of the simplest parts of the whole process, but it’s also where a surprising number of new advertisers get stuck. You sign in to OpenAI’s Ads Manager Beta, finish onboarding and verification, create a billing profile with your business name, address and invoice email, and then save a credit card with its billing address. Until that’s done, nothing delivers, no matter how good your campaign looks. OpenAI may place a temporary hold of about $100 on the card to verify it. Billing is postpay, so you’re charged after ads run, once unpaid spend hits a payment threshold or the month ends. The details that cause the most trouble are country and currency mismatches, thresholds you can’t change, and failed charges that quietly stop your ads. This guide walks through each of them in plain language so your first campaign goes live without a billing surprise.
Why Payment Setup Deserves More Attention Than You Think
Most people treat billing as an admin chore to finish after the “real” work of writing ads and picking targeting. With ChatGPT Ads, that order can bite you. Campaigns can’t start delivering until billing is fully configured, so a half-finished payment setup means a finished campaign that sits idle. Nobody enjoys building something carefully and then finding out it never went live because a form was incomplete.
There’s also a mindset shift here if you’re coming from other ad platforms. ChatGPT Ads is still in beta, and the billing rules reflect that. Thresholds are assigned rather than chosen, some account details can’t be edited after creation, and a few things you’d expect to fix yourself need a message to support. None of this is unreasonable, but it rewards people who read the fine print first.
Think of your payment method as the fuel line for the whole operation. Your targeting, creative, and landing pages are the engine, and the engine doesn’t run without fuel. Getting billing right on day one is a small investment that saves you from awkward pauses in delivery later, especially once you start spending real money and depending on steady results.

What You Need Ready Before You Open Ads Manager
A few minutes of preparation makes the actual setup feel almost effortless. Start with a working OpenAI account, since Ads Manager signs in through it. If you can, use a work email rather than a personal one, because this account is about to become the official home for your advertising and you’ll probably want colleagues involved eventually.
Next, gather your business details. You’ll need your legal business name, your business address, an email address where invoices should be sent, and the website you plan to advertise. It helps to have your logo and brand name handy too, since these show up alongside your ads.
Then think about the card. It needs to be a credit card, and it should belong to the same country or region as the business entity you’re registering. This matters more than people expect, and I’ll come back to it in its own section. Check that the card has enough available credit to handle a temporary hold and later charges, and that whoever owns the card is comfortable seeing and spending appear on the statement.
One more thing to decide in advance is who creates the account. OpenAI’s guidance is that each business should have just one account owner create the advertiser account, and that owner can then invite teammates. If three people each create their own account, you’ll end up with a tangle of duplicate accounts and billing profiles that’s annoying to unwind.
Creating Your Account and Getting Through Verification
Head to Ads Manager Beta, which lives at ads.openai.com, and sign in with your OpenAI account. From there you’ll walk through onboarding, where you enter your business information and set up how your brand appears in ads. Take your time with the country or region, currency, and time zone fields. Once the account exists, those can’t be changed, and a wrong choice here follows you into every billing conversation afterward.
After onboarding comes verification. OpenAI uses a third-party identity flow for this, and it can take a little while, because account review is not always instant. You may be approved quickly, or you may get a request for more information. If a request lands in your inbox, answer it promptly and completely. Vague or partial replies tend to stretch the process out.
A practical tip from watching people go through this: don’t schedule your campaign launch for the same afternoon you sign up. Verification, account approval, and billing all need to be complete before ads deliver, and any of them can add delay. Give yourself a buffer of a day or two, especially if you’re working toward a promotion date or a seasonal window.
While waiting on approval, you can usually keep moving on billing setup, so you aren’t just refreshing your inbox. Use the time to prepare creatively and decide on a budget. When approval arrives, you’ll be ready to hit the ground running instead of starting from scratch.
Building Your Billing Profile the Right Way
Before you can attach a card, you need a billing profile. This is the record OpenAI uses to issue invoices and communicate about charges, and it asks for three things: your business name, your business address, and an invoice delivery email.
Accuracy is the whole game here. Enter the business name exactly as it’s registered, because invoices carry that name and your finance team or accountant will care about it later. Use the country or region shown for your account, and fill in every required address field, including state or region and postal code where they appear. Skipping one field can leave the profile incomplete, which quietly blocks delivery.
The invoice email deserves more thought than it usually gets. OpenAI uses it for invoices and other billing-related messages, which includes notices when a payment fails. If you point it at a personal inbox that nobody watches, or at a colleague who’s about to leave the company, you might miss the one email that tells you ads have stopped serving. A shared mailbox such as accounts or finance often works better than an individual’s address, since it survives staffing changes.
Before you continue, read the profile back once as if you were the person receiving the invoice. Does the name match your legal paperwork? Does the address match your bank’s records for the card? Small inconsistencies between what you enter here and what your card issuer has on file are a common source of declined verification attempts.
Adding the Payment Method Itself
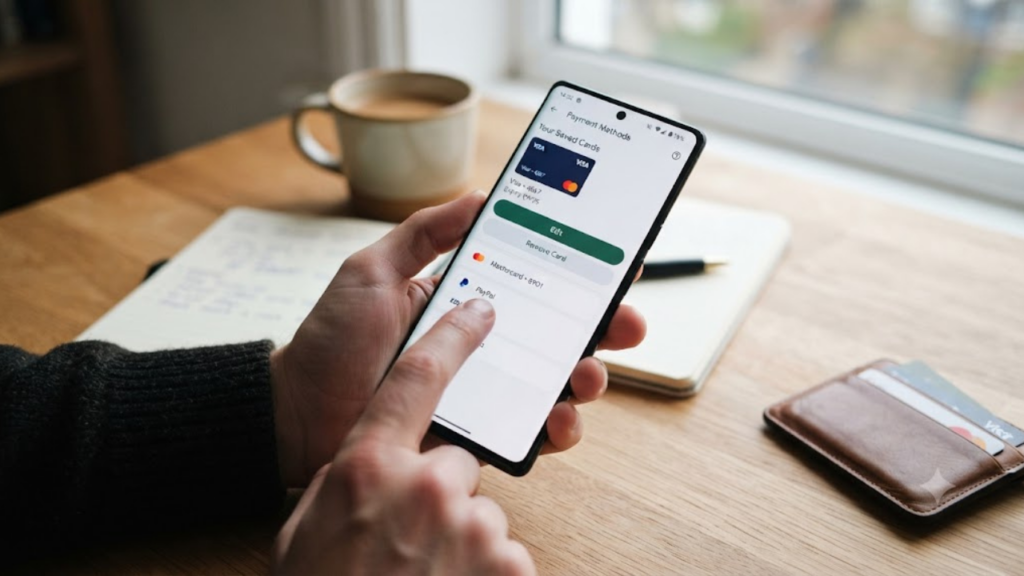
Now for the step you came for. Inside Ads Manager Beta’s billing area, you add a payment method by entering your credit card details along with the billing address tied to that card. That’s essentially it. The interface may shift a little as the beta evolves, so if a button sits somewhere slightly different from what you expected, trust the on-screen labels rather than any old screenshot.
A few habits make this go smoothly. Type the billing address exactly as your card issuer has it, since address mismatches are one of the top reasons a card gets declined. Double-check the card number, expiry date, and security code before submitting. Make sure you’re using a card that allows online and recurring-style charges, because some corporate cards and prepaid products block those by default.
If the card is rejected, resist the urge to try it five times in a row. Repeated failed attempts can trigger fraud protection on the issuer’s side and make things worse. Instead, call the bank or check the banking app, confirm nothing is blocking the transaction, and then try once more. If it still fails, switch to a different card and sort out the first one separately.
Once the card saves successfully, look for confirmation that billing status shows as complete. Some advertisers add the card and assume they’re done without ever checking whether other billing fields are still outstanding. A quick look at the account’s billing section, and at the status indicators on your campaigns, confirms that you’re genuinely ready to serve.
That $100 Hold: What It Is and Why You Shouldn’t Panic
When you add a card, OpenAI may place a temporary authorization hold of around $100 to verify that the payment method is real and working. It’s an authorization, not a purchase. The hold is released automatically, but it can sit on your card for up to three days before it disappears.
This is the moment where some people freak out. They see a pending charge on the banking app, assume they’ve been billed for something, and start emailing support. It’s worth telling colleagues about it beforehand, especially if the card belongs to someone in finance who might flag the transaction as suspicious.
The practical implication is that your available credit temporarily shrinks by that amount. On a card with a generous limit, you won’t even notice. On a low-limit card, or one already close to its ceiling, that hold could crowd out other purchases for a few days or even cause the verification attempt to fail. If you’re using a card with a tight limit, free up some room before you add it.
Notice also the phrase “may place.” Not every account will necessarily see this hold, so don’t treat its absence as a sign that something went wrong. And if you see it, don’t mistake it for your first real charge. The actual charges come later, and they follow rules that are worth understanding well.
How You Actually Get Charged: Thresholds, Month-End, and Postpay
ChatGPT Ads currently runs on a postpay model, which means you spend first and pay afterward. As your campaigns deliver, spend accrues on your account, and OpenAI charges the saved card at certain moments rather than after each click or impression.
The first trigger is your payment threshold. When your account is created, it’s assigned a threshold that decides how much unpaid spend can build up before the card gets charged. As an illustration, if yours were $25, the card would be charged whenever your unpaid spend reached $25. After a successful payment, the outstanding balance drops by that amount, and if delivery continues, spend accrues again until it hits the threshold once more.
The second trigger is the calendar. If any balance remains at the end of the month, it’s charged even when you haven’t reached the threshold. So a quiet account with a small balance still gets billed once a month, and you’ll receive an emailed receipt for every successful payment.
Newer advertisers typically start with a lower threshold. OpenAI may raise it automatically over time based on payment history and other factors, which is a sensible reward for reliability. Failed charges, disputes, and chargebacks can slow that progression, so a clean record genuinely matters.
Here’s the part people ask about most: you can’t manually change your threshold, and support won’t change it for you either. If you were hoping to negotiate a higher one for a big launch, plan around the number you have and let good payment behavior do the work.
Budgets Versus Thresholds: Two Numbers People Confuse
It’s very easy to blur two separate ideas here, and the confusion can lead to real budgeting mistakes. Your campaign budget controls how much a campaign is allowed to spend. Your payment threshold controls when the saved card is charged for spend that has already accrued. They’re unrelated controls that happen to involve money.
When you build a campaign, you choose either a daily budget or a campaign budget. A daily budget sets the most you’re willing to spend on a given day, while a campaign budget caps spending across the entire run. You can change the amount later, but you can’t switch the budget type once the campaign exists, so choose thoughtfully. Your objective matters for billing as well. A Views objective is bought on a cost per thousand impressions basis, while a Clicks objective is bought per click, and actual spend can vary with delivery and engagement.
Now the trap. Someone with a $25 threshold might assume they can never spend more than $25. Not true. The threshold is neither a budget nor an account spend cap. A campaign with a $500 daily budget can keep accruing spend while charges are applied in threshold-sized steps. If you want a real ceiling, that ceiling lives in your campaign budgets.
Understanding this distinction keeps you from two opposite errors. One is being surprised by spending that ran higher than the threshold suggested. The other is worrying that a small threshold will choke your delivery. Keep the two numbers separate in your head, and your cash flow planning gets far easier.
Country, Currency, and Card Mismatches That Trip People Up
If there’s a single billing headache that catches people off guard, it’s the match between account setup and payment details. OpenAI expects your billing information and payment method to line up with the business entity and country or region you used when creating the account. If the account was set up for a U.S.-based business, use a U.S. billing address and a U.S.-linked payment method. A card tied to another country may simply not be accepted.
This surprises agencies and international founders the most. Maybe your company is incorporated in one country but your favorite corporate card was issued in another. Maybe a freelancer offers to use a personal card to help you get started. Both situations can lead to a rejected payment method that looks like a technical glitch but is really a policy mismatch.
Country, currency, and legal entity details are tied to account setup and billing records, so they may not be editable yourself after the fact. If you entered the wrong ones, you’d need to contact support with your ad account ID, the current details, the details you want, and the reason. If you truly need to bill under a different country, region, or legal entity, the cleaner route may be creating a separate advertiser account with the correct business and billing information.
Ads availability itself is also limited to certain markets and has been expanding, so confirm that your country is currently supported before investing time in setup. The lesson is to decide these details deliberately at the start, because they’re the least forgiving fields in the whole process.
What to Do When a Payment Fails
Even well-prepared advertisers hit a failed payment sometimes. A card expires, a limit gets reached, or a bank flags an unfamiliar merchant. What matters is how quickly you notice and respond, because a failed payment after your account reaches its threshold can cause ads to stop delivering until the issue is resolved.
You’ll get an email if an invoice payment fails, which is exactly why the invoice email in your billing profile matters so much. Inside Ads Manager, campaigns, ad groups, and ads may show a Not serving status, and hovering over the status tooltip gives more detail about the cause. Treat that tooltip as your first diagnostic tool before assuming anything is broken with your creative or targeting.
The fix is usually simple. Open Ads Manager Beta, update the saved payment method, and confirm the card can actually be charged. If the bank blocked the transaction, call them and approve it. If the card is expired or maxed out, add a new one. Once the outstanding payment goes through, delivery can resume, though it may not restart the very second you pay.
Prevention beats repair here. Keep calendar reminders for card expiry dates, watch the invoice inbox, and avoid running your account on a card that’s near its limit. Remember also that failed charges, disputes, and chargebacks can slow your progress toward higher thresholds, so one careless billing lapse can have effects that last longer than the pause itself.
Updating or Removing a Payment Method Later
Business life changes. Cards get replaced, companies switch banks, and finance teams decide all advertising should move to a different corporate card. When that happens, you’ll want to update the saved payment method in Ads Manager Beta rather than letting the old one fail at a critical moment. Add the new card first and confirm it is saved properly before worrying about the old one, so you’re never without a working method.
Removal is a little different. If self-serve removal isn’t available in your account, the recommended approach is to first resolve any outstanding balance and pause or end campaigns you don’t want to continue. If you need help with account deactivation or payment method questions after that, contact OpenAI’s ads support team with your ad account ID and billing details. Being organized when you write makes the exchange far faster.
If you ever think a billing number looks wrong, gather your evidence before reaching out. A strong request includes the invoice or charge ID, the date range in question, the amount you’re disputing, the affected campaign IDs, and reporting screenshots or exports. Support teams can act on specifics, while a vague message like “my charges look too high” tends to bounce back and forth for days.
One extra caution: avoid filing a dispute with your bank before talking to support if you can help it. Chargebacks can put a mark on your payment history and slow the growth of your payment threshold, which is a cost you probably don’t want to pay over a misunderstanding that a simple email could solve.
Handling Billing When a Team or Agency Is Involved
Plenty of advertisers don’t run everything alone. You might have a marketing manager building campaigns, a finance lead who owns the company card, and an agency helping with strategy. Billing gets messy quickly when nobody’s sure who has access to what.
Start by remembering that one person creates the advertiser account as its owner, and that owner then invites the others. Decide up front who should have billing visibility. Ideally, the person who controls the company’s money should be the one who enters the card details, or at least be closely involved, so you’re not passing card numbers around in chat messages. Everyone else can be given access appropriate to their role once billing is live, typically through the users section in settings.
If you work with an outside agency, keep ownership of the account and the payment method in your own business name. That way, if the relationship ever ends, your account, history, and billing records stay with you. Agencies can be invited as collaborators without holding the keys to your payment information.
This is also where a knowledgeable partner earns their fee. Complete Gurus offers ChatGPT Ads specialists who help with campaign strategy, conversational ad creative, placement planning, and performance reporting, and they work in a way that keeps your business at the center of the account. Having someone who’s already been through the billing setup, and who can spot a mismatched country or an unwatched invoice inbox before it becomes a delay, can spare you a lot of wasted time.
Setting Up Payment Is Step One: What Comes Next
Once your card is saved and billing shows as complete, it’s tempting to celebrate and rush straight into launching. Take a breath, because a live payment method just means you’re allowed to spend. It doesn’t mean you’ll spend wisely. What you do in the next few days decides whether that first threshold payment buys you real customers or just a lesson.
The next priority is measurement. Spending on ads inside ChatGPT without conversion tracking is like driving with the dashboard covered. OpenAI provides a measurement pixel, and connecting it lets you see conversions instead of guessing from clicks alone. Complete Gurus has published practical walkthroughs on setting up the OpenAI Pixel on your website and on ChatGPT Ads conversion tracking, and they’re worth a read before you turn on your first campaign.
After tracking, think about how people actually phrase things in conversations. Writing and copying the way you’d write for a search results page or a social feed usually falls flat here, because people talk to ChatGPT like they’d talk to a knowledgeable friend. Your creative and targeting should match that natural, question-driven behavior.
Finally, start small and learn fast. Since you control budgets separately from thresholds, you can begin with modest daily limits, watch the numbers for a couple of weeks, and scale only what’s working. If you’d like a second pair of eyes on your setup, Complete Gurus also offers a free AI Search Visibility Audit and a free paid ads audit, which can surface gaps in how your brand appears across AI platforms and paid channels alike.
Suggested Reading: Google Ads vs SEO for Medical Test Prep Academies: Which Should You Invest in First?
Conclusion
Adding a payment method to ChatGPT Ads isn’t difficult, but it rewards care. Sign in to Ads Manager Beta, complete onboarding and verification, build an accurate billing profile, and save a credit card whose country and business details match your account. Expect a temporary hold of around $100, understand that you’re billed after delivery once your threshold or month-end is reached, and keep your invoice email somewhere it’ll actually be read. Remember that thresholds and budgets are different things, that you can’t change your threshold yourself, and that a failed payment can quietly stop your ads until you update the card. Treat billing as the foundation of your campaign rather than an afterthought, and everything built on top of it becomes a lot more dependable.
If you’d rather not navigate the setup, testing, and tracking on your own, the team at Complete Gurus (https://completegurus.com/) is ready to help. With more than a decade of paid advertising experience, dedicated specialists, weekly transparent reporting, and hands-on work in ChatGPT Ads, Google Ads, Meta Ads, and AI search visibility, they can take you from a saved payment method to campaigns that are tracked, tested, and built to grow. Visit https://completegurus.com/ to request a free audit and see what your ChatGPT advertising could look like.

Ashutosh Mishra is an AI Visibility & Performance Marketing Expert with 14+ years of experience helping businesses grow through AI Visibility (AEO/GEO), Google Ads, Meta Ads, and SEO. He partners with founders and business leaders to build data-driven growth strategies that increase visibility, improve marketing performance, and help businesses get discovered, trusted, and recommended in the age of AI.